Approx. 6 min read
Convert Word Documents to PDF Instantly on Mac with Automator
How to Quickly and Easily Convert DOCX Files to PDF on Your Mac Using a Custom Quick Action in Apple Automator
June 23rd, 2025 at 9:20PM
Introduction
If you're a Mac user, have you ever found it inconvenient that there's no quick shortcut to export DOCX files to PDF? Imagine being able to select one or more Word documents, right-click, and instantly see an option to export them to PDF - no need to open each file individually. Just two clicks, and you're done. Simple, fast, and efficient. Wouldn’t that be a game-changer?
Tools We Will Need
Apple AutomatorApple Automator is a built-in macOS application that allows users to automate repetitive tasks without writing code (however, you can write code if you want to). It provides a visual, drag-and-drop interface where you can build workflows by connecting pre-made actions — much like snapping together digital Lego blocks. Using Automator, you can create a Quick Action that integrates seamlessly into the macOS right-click menu. In this case, the Quick Action will take one or more .docx files as input and use AppleScript to convert them to PDF, leveraging Microsoft Word’s built-in export engine for high-fidelity results (explained below).Licensed Microsoft WordA licensed copy of Microsoft Word is essential when you need to convert `.docx` files to `PDF` with full formatting fidelity or automate tasks like batch exports, scripting, or integration with tools AppleScript. These methods rely on Word’s built-in export engine, which accurately preserves complex layouts, fonts, tables, and other advanced document features that alternatives often misinterpret. Without a valid license, Word runs in limited or read-only mode, disabling key functions like saving, exporting, or responding to automation. To enable full functionality, you must install Microsoft Word and sign in with a valid Microsoft 365 or standalone license.
Step 1: Open Automator & Create New Document
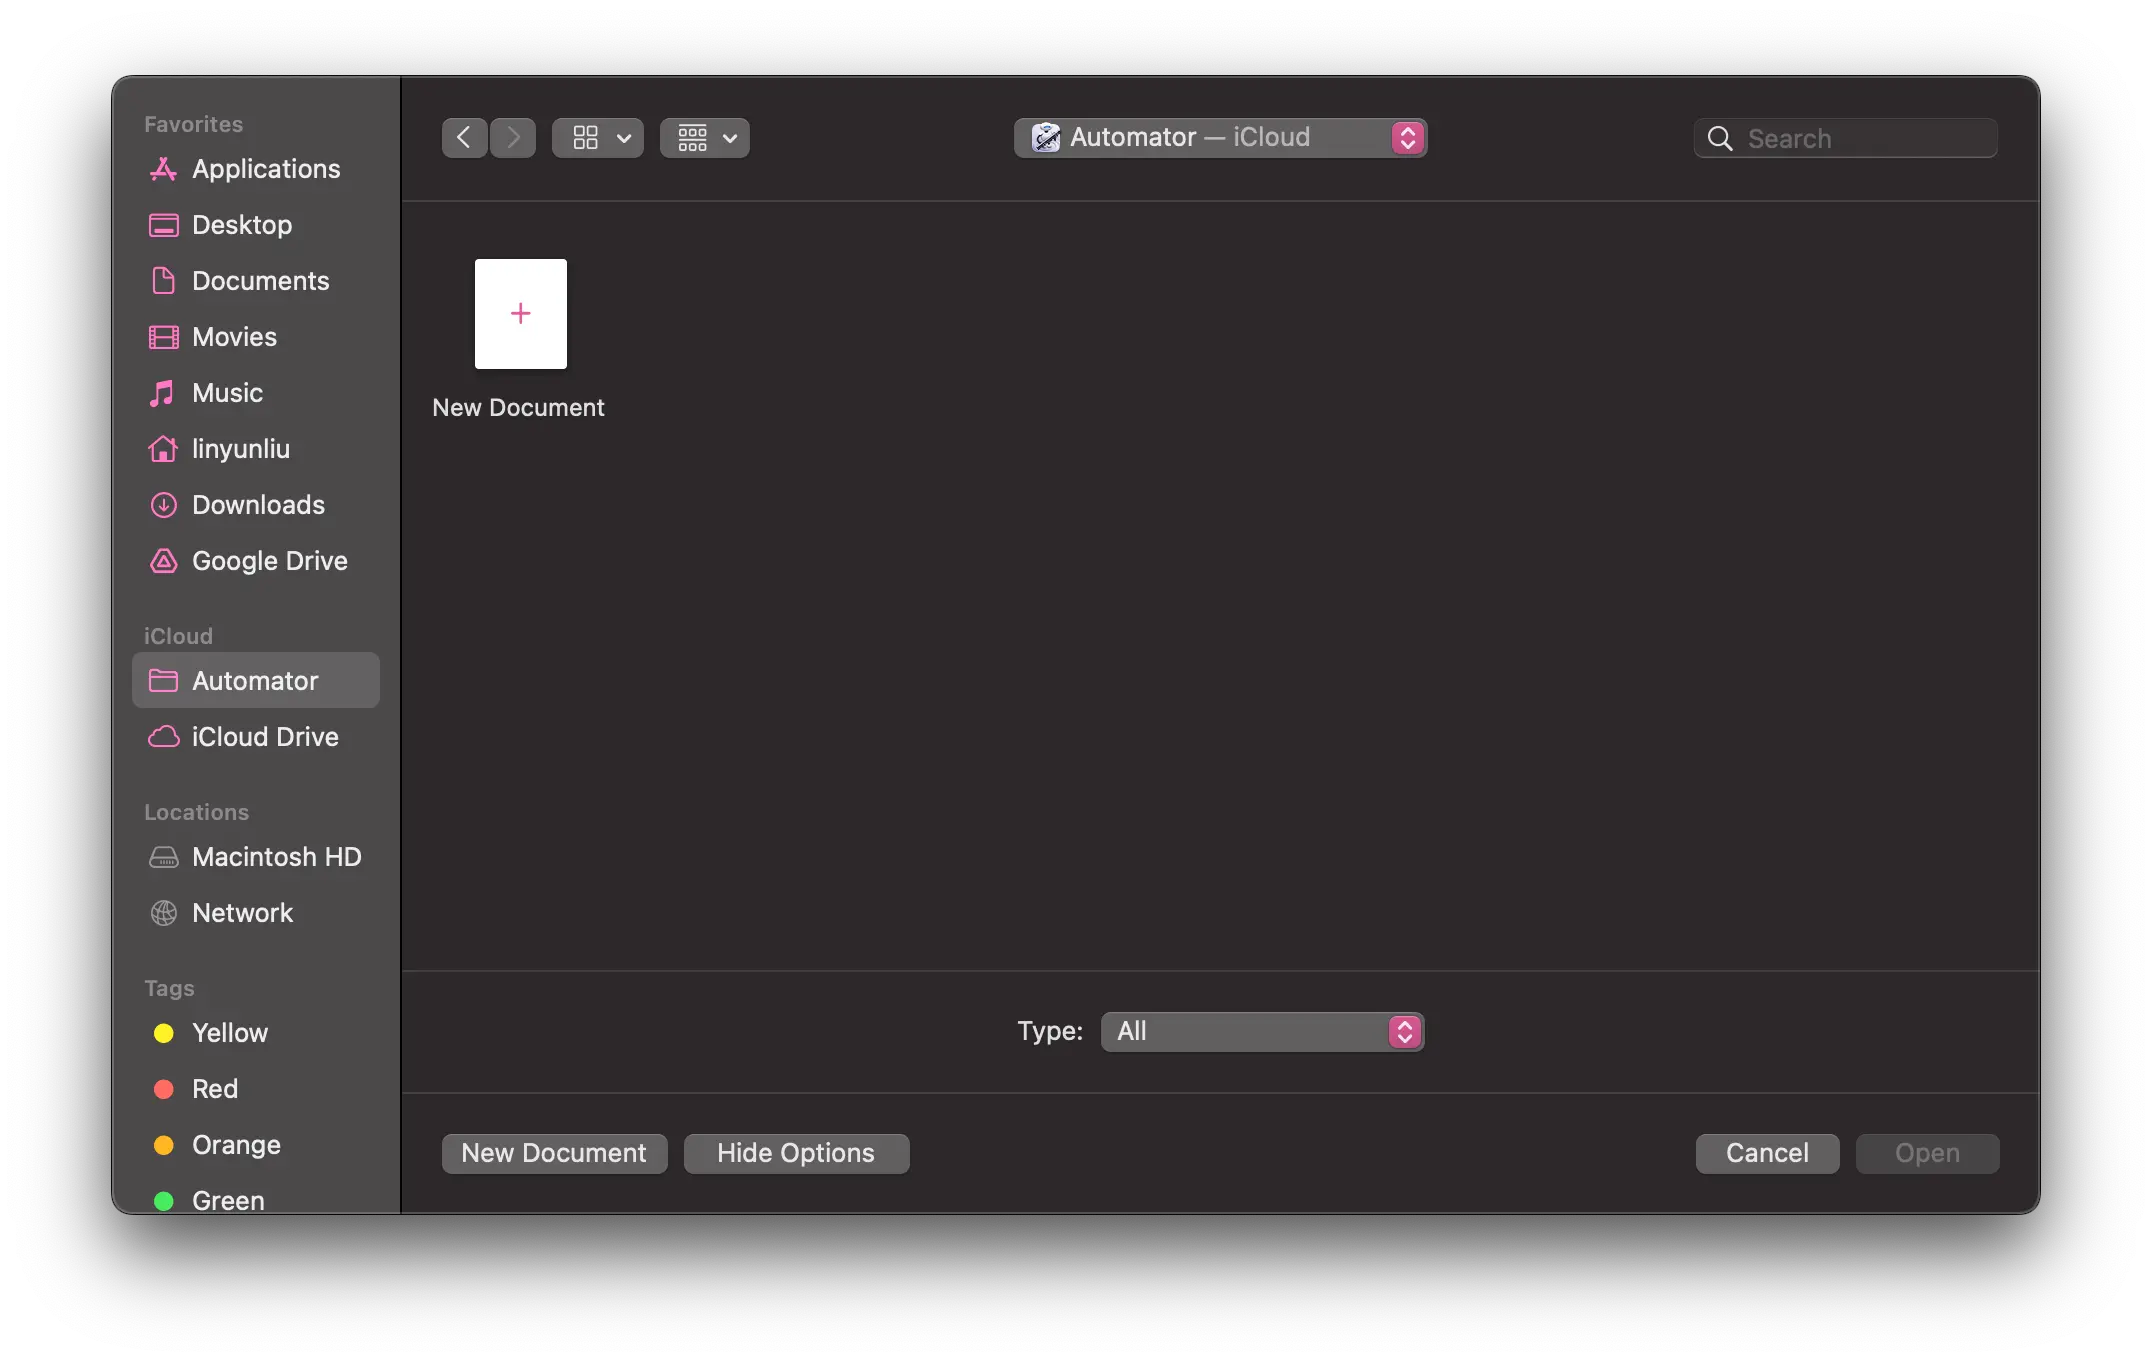
Open Automator on your Mac, it’s typically found in the "Other" folder within Launchpad. Once the application launches, click the "New Document" button to get started. You’ll then be prompted to choose the type of automation you want to create.
Screenshot
Step 2: Create A Quick Action
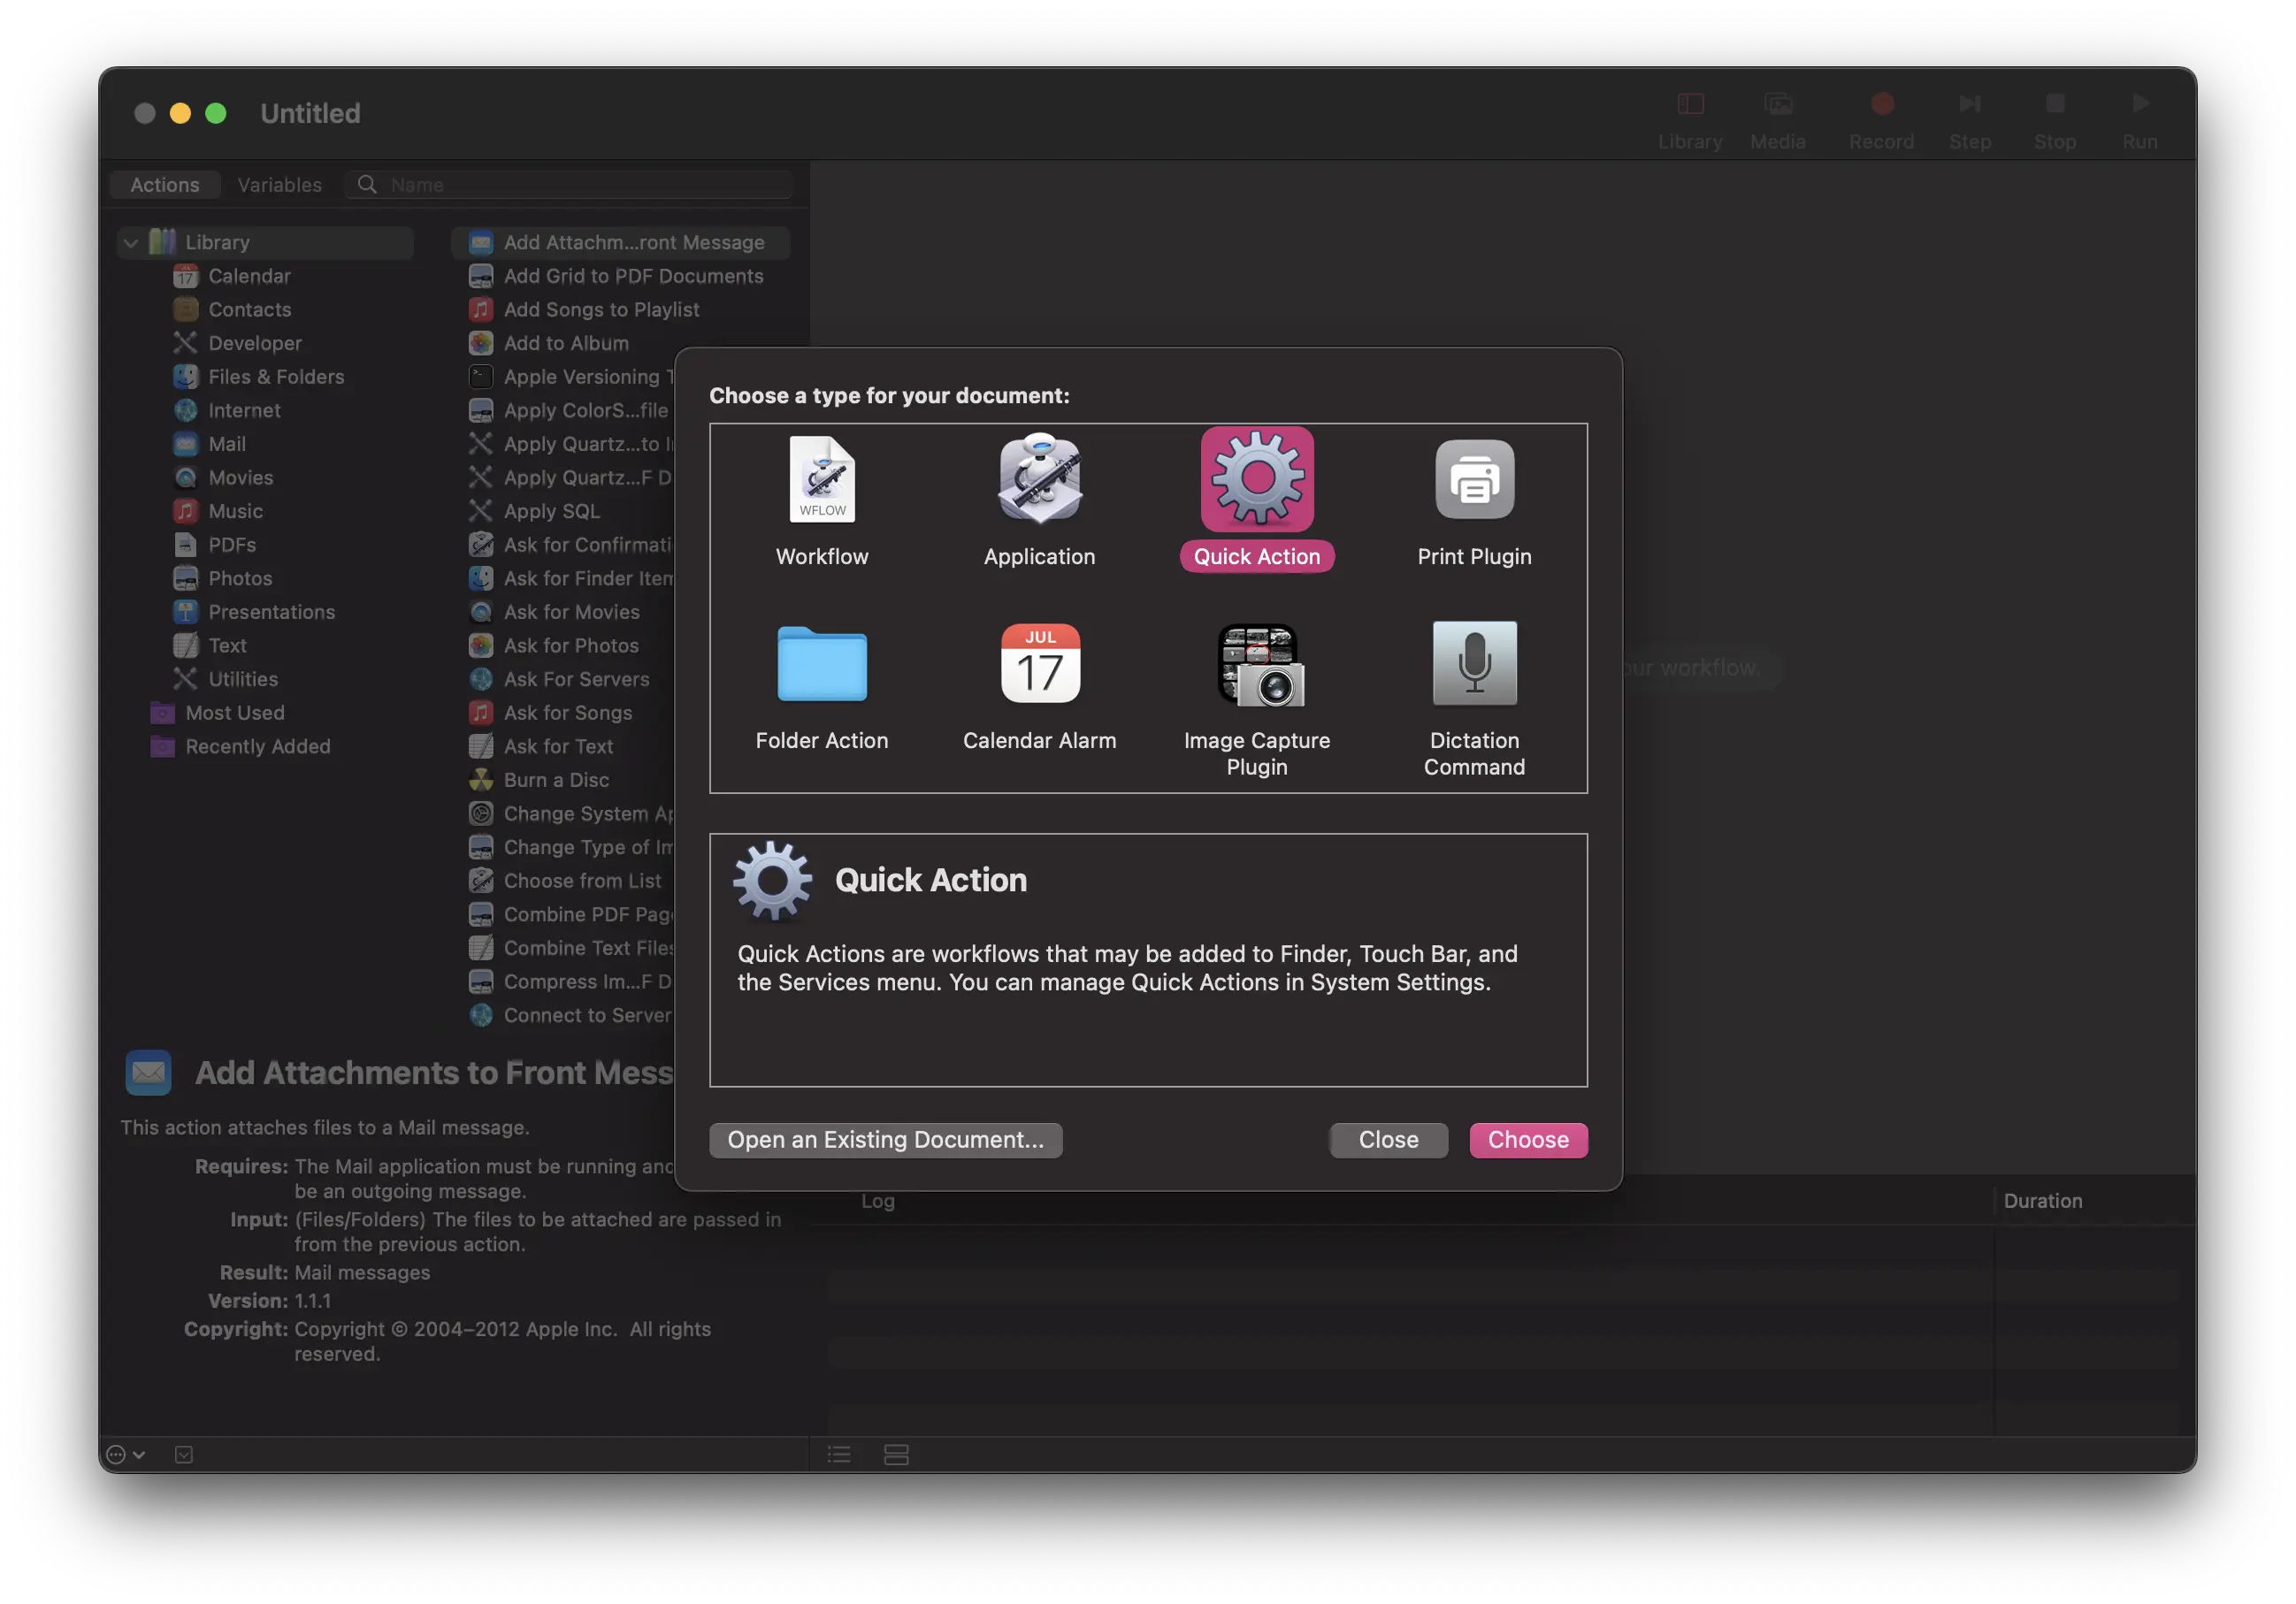
In the new document window, select “Quick Action” as the type of automation. This will allow you to create a custom workflow that can be accessed directly from the Finder’s right-click menu
Screenshot
Step 3: Edit Workflow
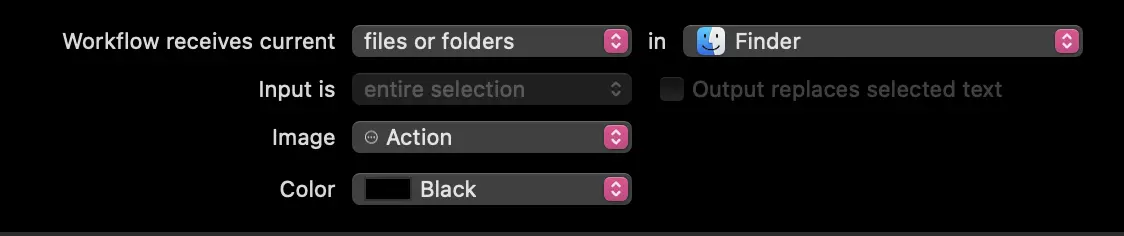
As shown below, set the workflow to receive files or folders in Finder. You can also choose a custom icon to make your Quick Action easier to recognize
Screenshot
Step 4: Add AppleScript
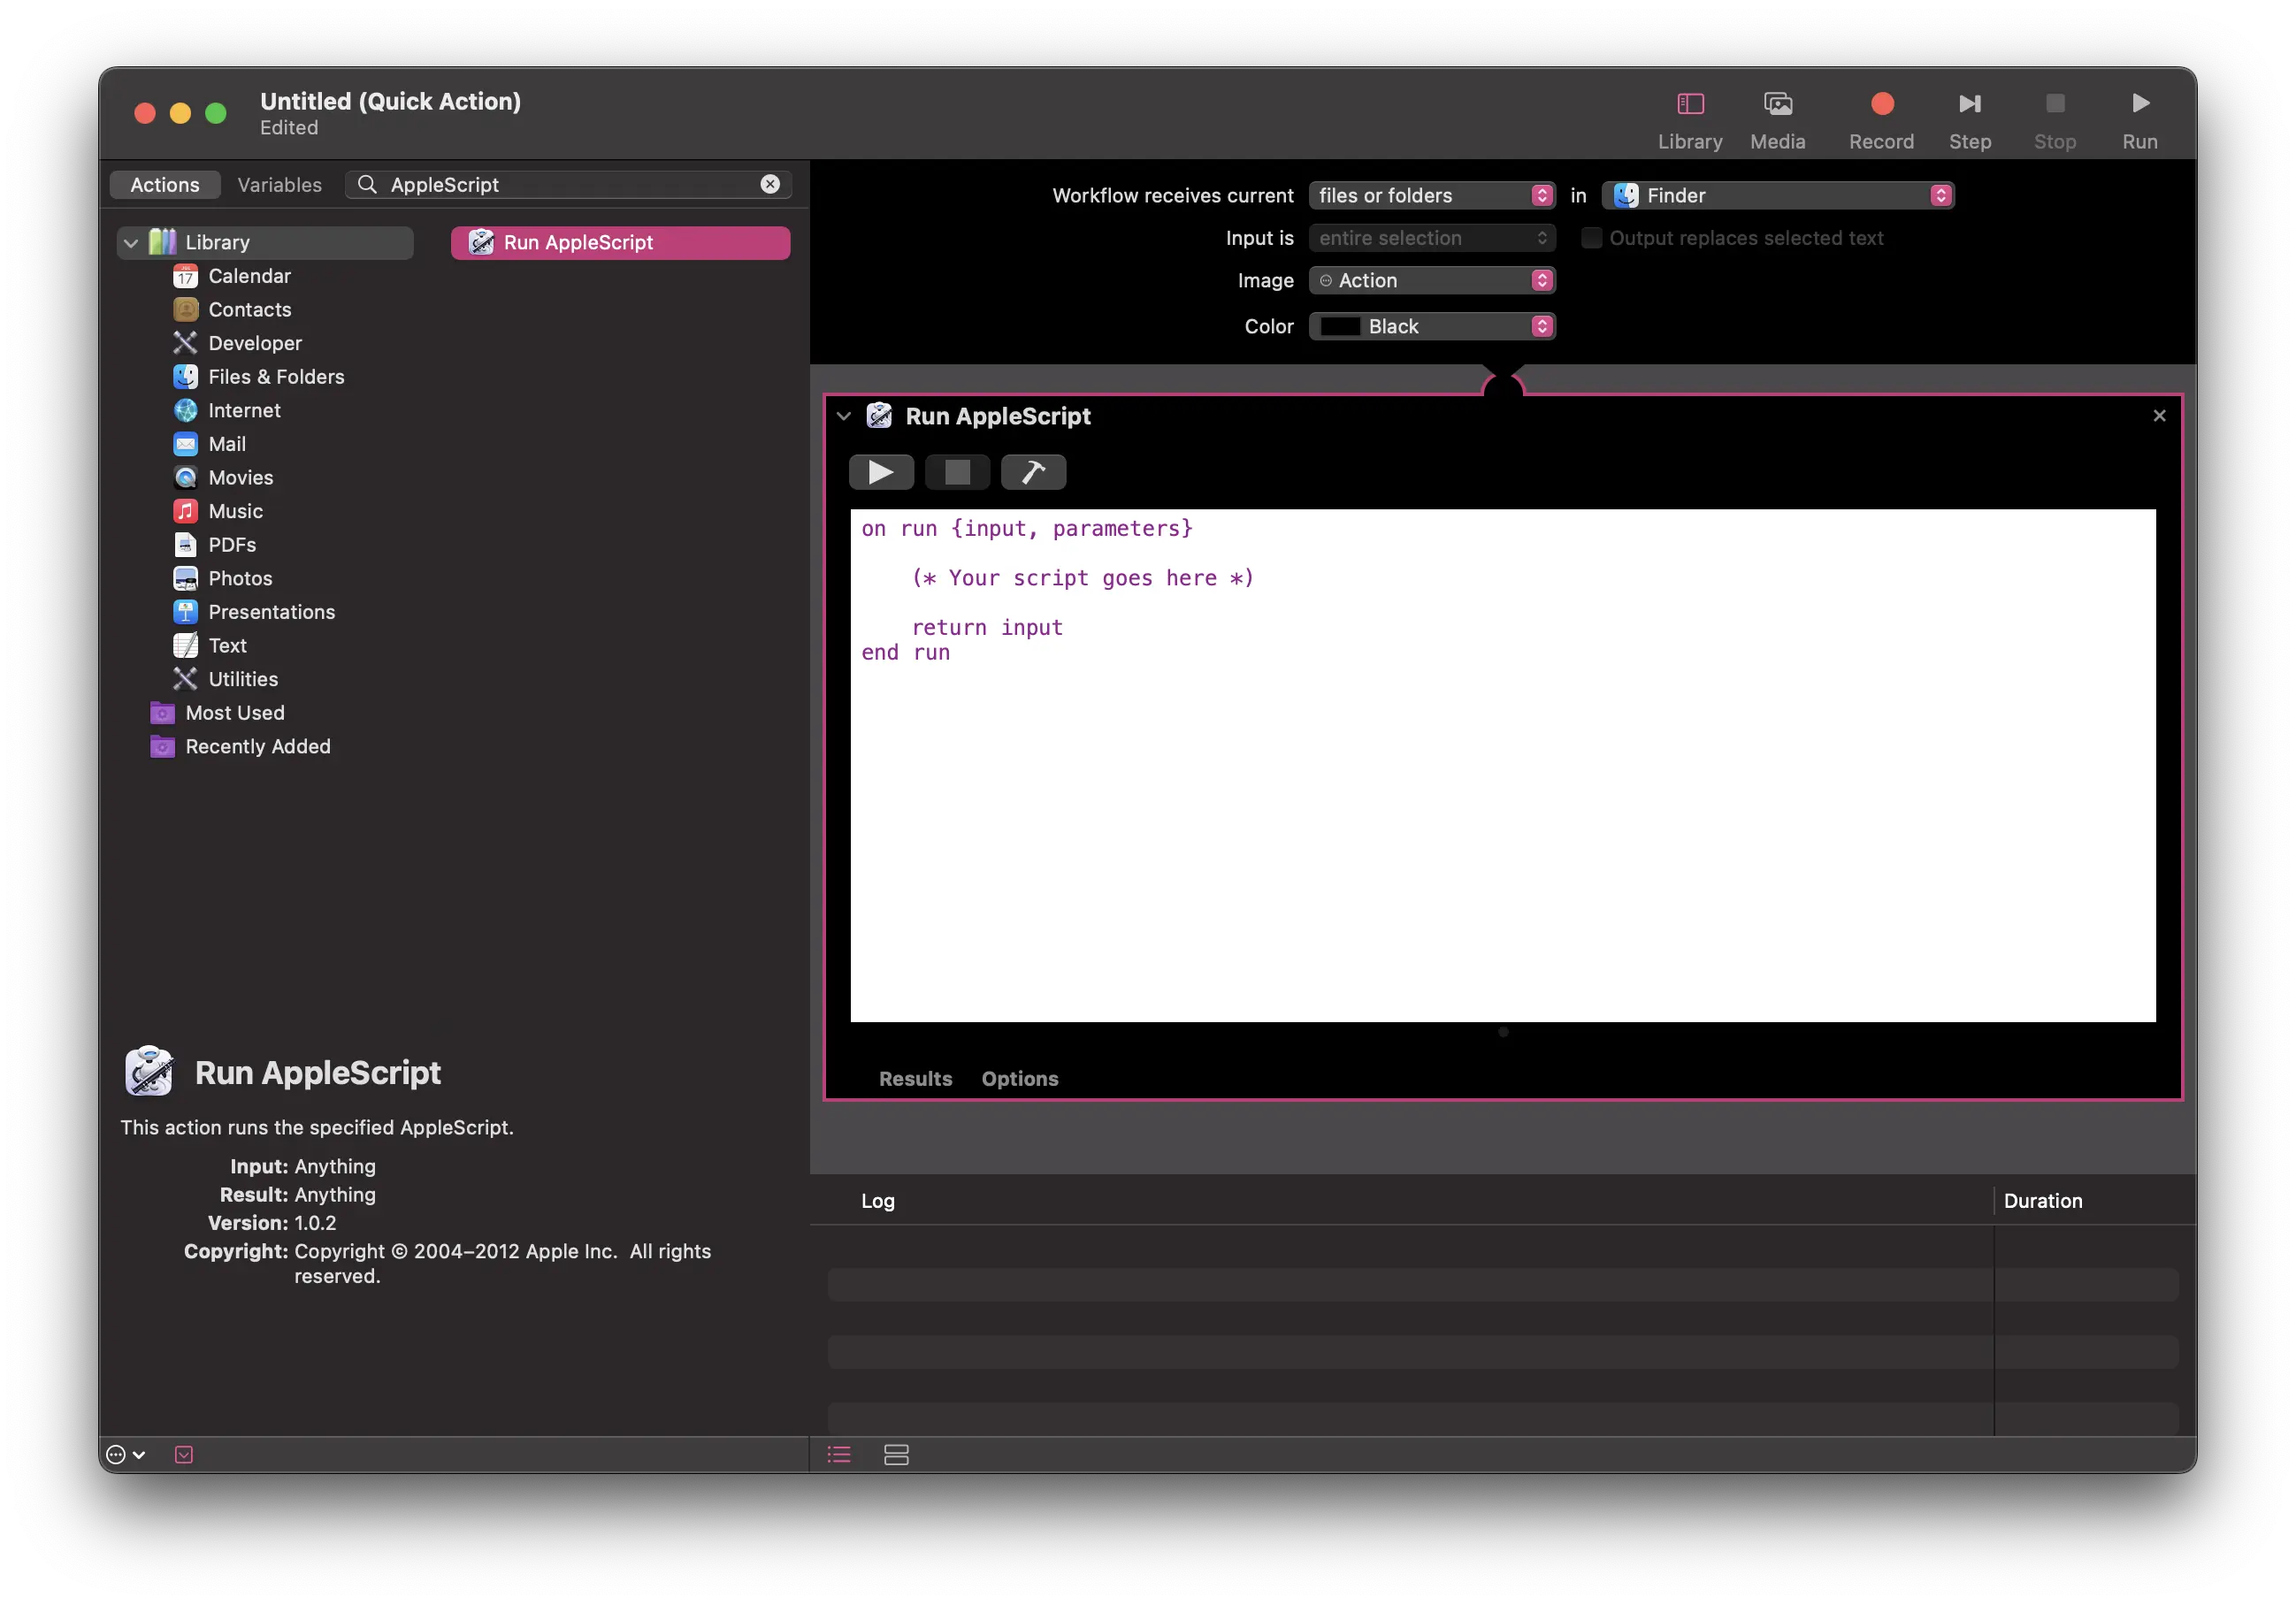
In the search bar at the top left of the Automator window, type AppleScript, then drag the Run AppleScript action into the workflow panel on the right. This allows you to write a script that will take one or more .docx files as input and export them as PDFs.
Screenshot
Step 5: Write Some AppleScript
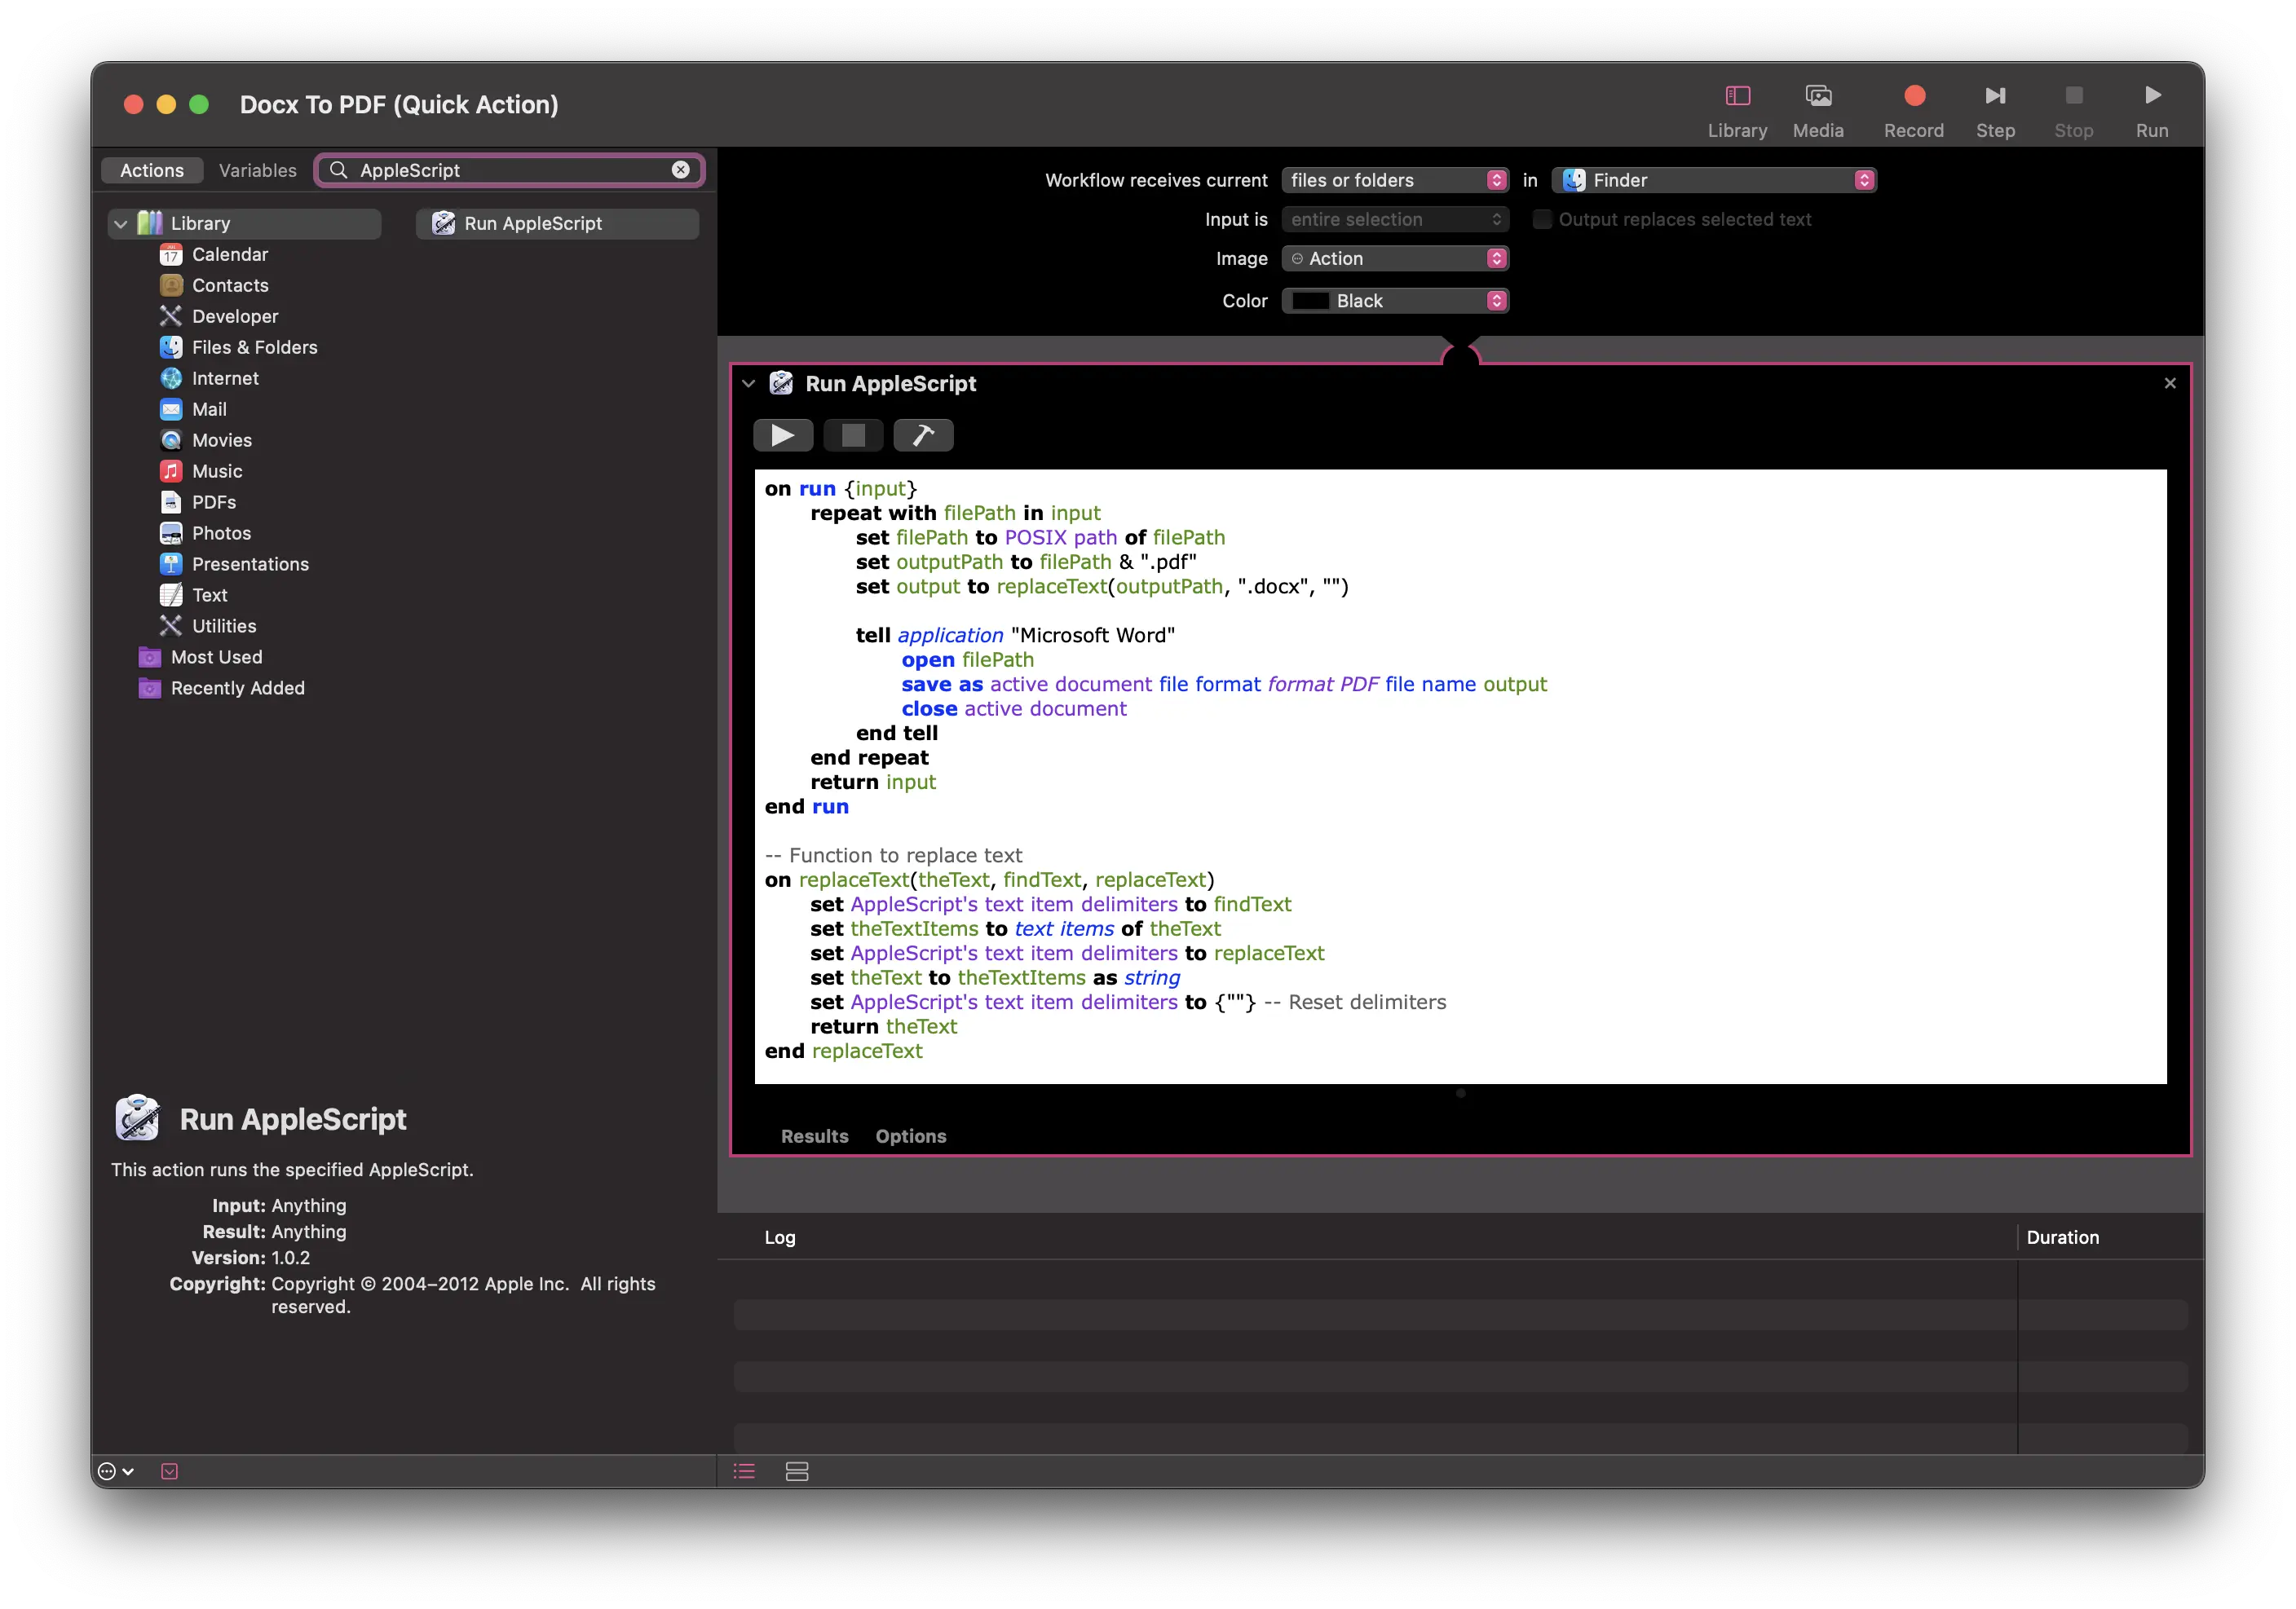
When this script runs, it loops through each selected files. Then, for each file, it tells Microsoft Word to open the document, export it as a PDF using Word’s built-in export feature, and close the document afterward.
Screenshot
AppleScript
on run {input}
    repeat with filePath in input
        set filePath to POSIX path of filePath
	set outputPath to filePath & ".pdf"
	set output to replaceText(outputPath, ".docx", "")

	tell application "Microsoft Word"
	    open filePath
	    save as active document file format format PDF file name output
	    close active document
	end tell
    end repeat
    return input
end run

-- Function to replace text
on replaceText(theText, findText, replaceText)
    set AppleScript's text item delimiters to findText
    set theTextItems to text items of theText
    set AppleScript's text item delimiters to replaceText
    set theText to theTextItems as string
    set AppleScript's text item delimiters to {""} -- Reset delimiters
    return theText
end replaceText
Step 6: Save This Quick Action
Save your Quick Action and give it a name like "Docx to PDF". This will create a workflow file located at: /Users/your-username/Library/Services/. If you ever want to remove the Quick Action, you can simply delete the workflow file from that directory.Once your Quick Action is saved, you can use it by doing the following:1. Right-click on one or more .docx files in Finder2. Hover over Quick Actions in the context menu3. Click on your custom action (e.g., “Docx to PDF”) to run it
In Conclusion
If everything is set up correctly, you now have an incredibly convenient Quick Action that can convert a single .docx file or an entire batch into high-fidelity PDFs with just a 2~3 clicks.
GitHub
We’ve included the AppleScript used in this tutorial in our GitHub repository. Feel free to use it as-is, modify it to suit your needs, or improve upon it however you like.
Feedback?
We are open for criticism! Please leave a note if you believe there are anything that needs improving or if there are any mistake being made in the post, including copyright issues or missing references. Feel free to share other thoughts and suggestions as well!
Write a Feedback